Kick is a new streaming platform that seems to be aimed primarily at the young male demographic. Most of its content creators focus on slot and other online gambling platforms, IRL content and fps games, although there is other content produced on it as well. But the main attraction of Kick is its generous creator reward program, whereby creators earn an hourly salary that is based on their follower base, view count, subscriber count and other factors., as well as the fact that they can keep 95% of their subscription fees and 100% on their tips, which is far more generous than other live streaming platforms. So, it’s no wonder that many streamers are looking to branch out to Kick either as a main platform or as a dual-platform.
So how do you stream on Kick?
The first step is to create a Kick account, which we have explained how to do in another article. Nevertheless, the basic steps are:
- Visit the Kick home page and click the ‘Sign Up’ button
- Fill out the KYC form, which includes your email address, username and password
- Confirm your email address by going to your email account and clicking through the confirmation link
- Click ‘Accept’ when shown Kick’s Terms and Conditions
The next steps are to download compatible streaming software and to acquire the right equipment.
Which streaming software is compatible with Kick?
The good news is that Kick is compatible with a few streaming software suites. These include OBS Studio, OBS.Live and OBS Streamlabs (SLOBS), which are also all free. Xsplit doesn’t seem to have adapted its suite yet, but since Kick has just launched, there are likely many more that will become accessible in the future. But buying a suite is unnecessary when you are starting out anyway, as even many big names such as Pokimane, Tfue and Shroud, among others.
The links for downloading the aforementioned streaming software suites are as follows:
How to connect your streaming software to Kick
You must set your stream info BEFORE going live in your streaming software. Once you start streaming in your software, your channel will be live on Kick and your recording will start. Then, once you stop your stream in OBS, your stream will show an offline screen for two minutes while your VOD is processing. But you can continue to edit your stream info at any point during your live stream.
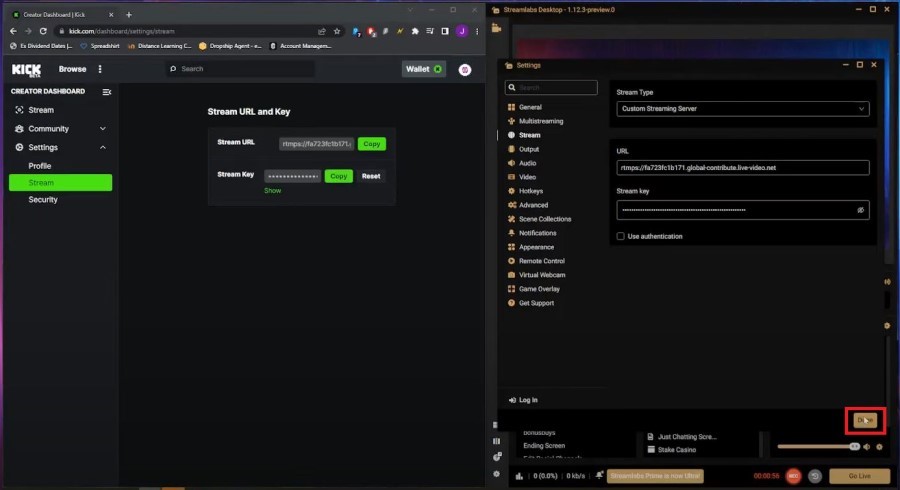
Here is a split screen example of how to start a Kick livestream using Streamlabs. Kick is on the left, while Streamlabs is on the right:
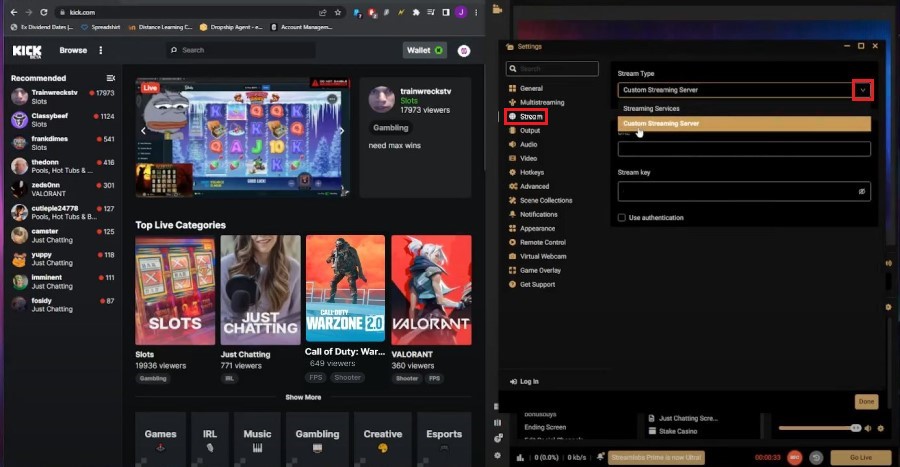
- Open the ‘Stream Tab’ in Streamlabs and then select ‘Custom Streaming Server’ under Stream Type
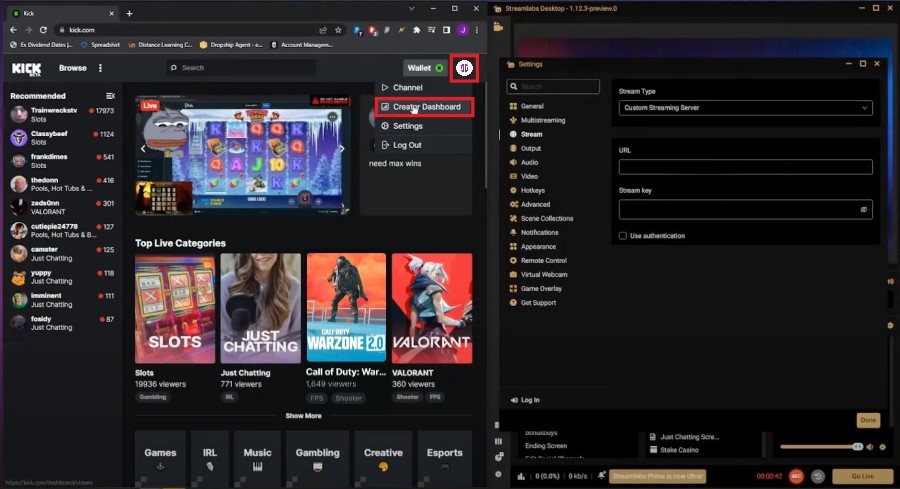
- In Kick, Click on your profile and select ‘Creator Dashboard’ from the dropdown options
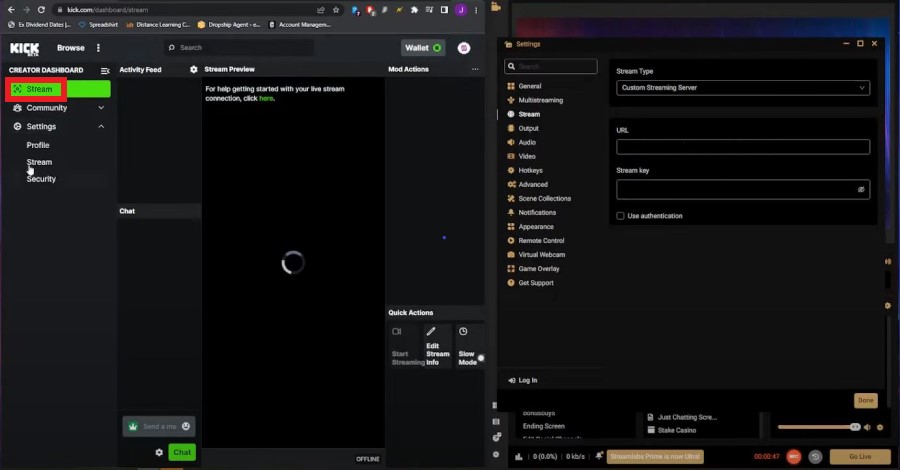
- Select ‘Stream’
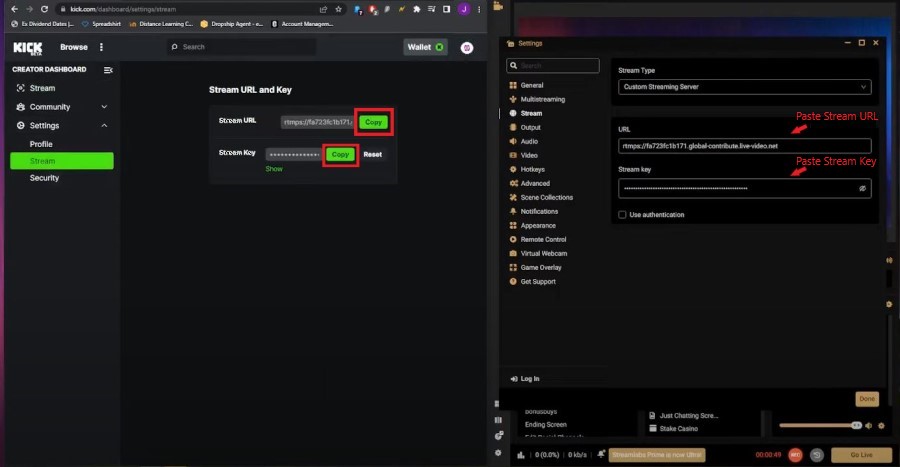
- Copy the ‘Stream URL’ from Kick and paste it under ‘URL’ in Streamlabs. Do the same for the ‘Stream Key’
- Under Streamlabs, click ‘Done’
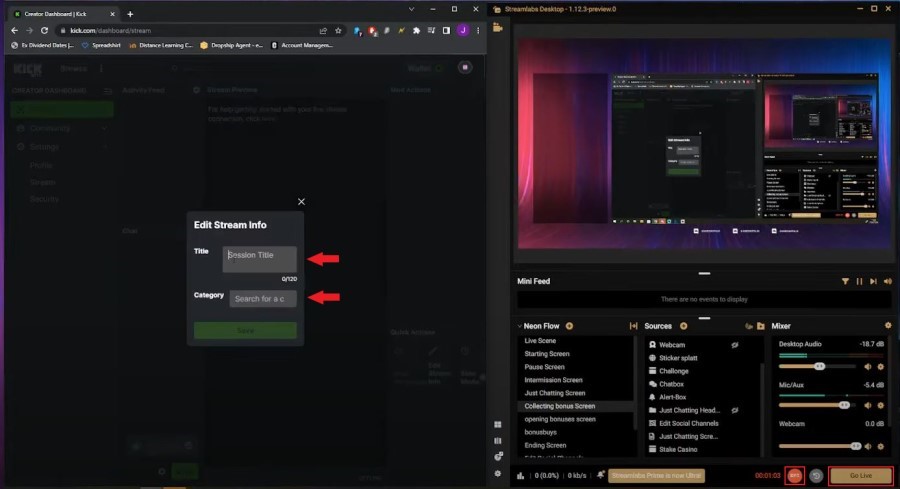
- First on Kick enter in the title of your stream and the category. This can be changed at any time during your stream. Then on the Streamlabs side, click ‘Go Live.’ If you would like to record the livestream for later, then press ‘REC’ before ‘Go Live’
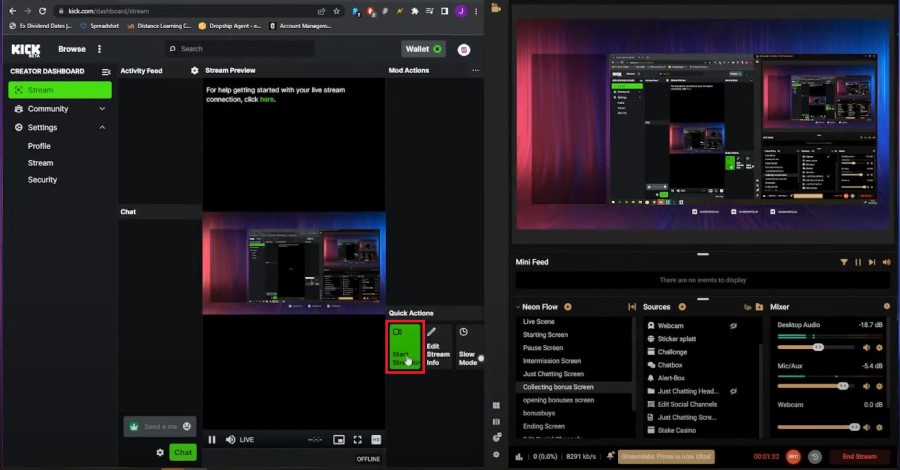
- On Kick, Select ‘Start Streaming’ from the Quick Actions pop-up. It is important to start streaming from your streaming software before you go live on Kick.
What equipment you should get for streaming
The most important thing to have is a PC with the minimal spec requirements for streaming on Kick. These are the specs required by your streaming software of choice.
To start out with, it’s fine to keep your investment minimal. If you have a clear microphone, it doesn’t matter if it is from a cheap earbud. As for webcams, you don’t need a state-of-the-art camera either. Many streamers still stick with the Logitech C920, Logitech C922, Logitech Brio, Elgato Facecam or the Razer Kiyo.
Then, try out streaming for a while and see how it goes. You might not enjoy it, or it might take a while for you to gain subscribers and make a decent amount. Only once you are sure that you would like to continue and have the financial flexibility to make extra purchases should you continue to do so. Even then, upgrades for things such as microphones, mice and headsets don’t need to be expensive either. The best way to evaluate this is to find out what equipment a streamer uses and then watch their stream to see how you feel about the visual and audio quality of their production.